This was my inspiration piece from Pinterest. It’s from an Etsy artist (her store is called Curiously Wrought, definitely check her stuff out). I loved it and wanted to try it out myself.
Here is the link to my pin on Pinterest HERE.
Here are my supplies:
- A board (not particle board), mine was about 12″x14″. I was too lazy to cut it. Cost: FREE
- 2 packages of wire nails (I used #17 x 1″ 1.75 nail head) COST: $2.60 (for both)
- A picture hanger for the back of the board COST: $2.97
- Crochet cotton (I used the “fine” kind). Found in the yarn section of craft stores. COST: $1.49
- Paint for the board. I bought one of those tester kits and it was more than enough. COST: $2.94
TOTAL COST: $9.97
Paint the board. Give it plenty of time to dry.
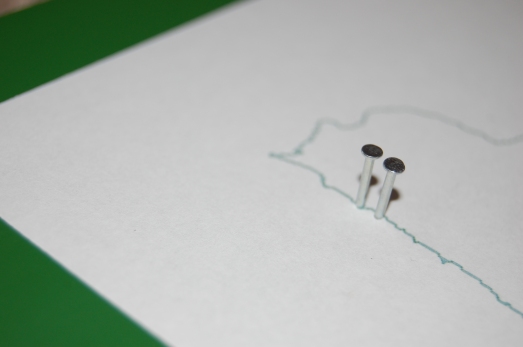
I printed out my state outline and taped it on the painted board, but I should have just used it to draw a pencil outline on the board. Nailing through the paper actually caused some problems for me–not recommended. Instead, put the paper outline on the board, use a metal/plastic blunt edge to trace around the state and create a small indentation in the wood to create your line. **I’ve tried this, and it worked really well!**
Start nailing around your outline. Keeping a tiny bit of space between the nail heads is preferable.
Draw a heart outline and add nails.
Remove the paper. (This is where I ran into trouble, little bits of the paper stuck near the base of the nails–you can see it in the picture below–and I spent at least 15 minutes picking out the paper I could with tweezers)
Choose a starting point to weave the yarn and tie to the state outline. Pull the yarn to the heart and then back to the state outline. Continue around the state.
Add the hardware to hang your art to the back. Measure to make sure it’s centered.
Done!
I’m linking up with Young House Love (one of my absolute FAVORITE blogs) for their Pinterest Challenge. Check out their blog, you’ll be blown away.
I’m being featured on Daily Do It Yourself today, check the post out HERE.


This is awesome!! Great job.
LOVE THIS!
I love it! I’ve pinned a couple of things like this, but I always thought it would be waaaay difficult. Thanks for sharing the tutorial!
How long did this take? How ever long it took was worth it, it looks fabulous.
Hi Alyssa,
It took me about an hour and a half to do the nailing, and a couple hours to do the yarn wrapping. Although, I did several patterns with the yarn before I ended up sticking with the original idea, so I bet the time would be shortened. I’m guessing about 3 hours total (minus the painting/drying time).
Hope that helps!
I pinned this but it’s been scaring me because it seemed so complicated. I think I’ll give it a whirl.
I’ve seen this on there and been loving it, but hadn’t even thought to DIY it! Love how it came out!!
I love it! I’ve had this pinned for awhile, and I’m glad to have a second account of how to do it! Thanks!
I have this pinned, too! Yours came out wonderfully. 🙂
This looks great!!
Beautiful! I need one of these in my life. 🙂
This looks so good!
I’ve pinned this too, but like the others had put it in the ‘too hard’ basket. I’m inspired to give it a go now. Thank you!
Wow you have a lot of patience to nail all of those little nails! But I think it was well worth it this looks SO cute! Love it!
I have this pinned too! I bought stuff to make it last weekend but haven’t gotten to it yet. I have completely different materials to try it with though. Yours looks great, hope mine turns out alright since everything is different!
Good luck Kelly! I’m sure it will turn out great!
Pingback: Wall Art to Represent Your Home State
So glad to have featured this – awesome project! xo Jenna
Where did you get the string from?
Where did you get the string from? I plan on starting this tomorrow and the string is the only thing I do not know where to find.
I used the thin kind of crochet yarn (what people use to crochet doilys). I purchased it at Michaels (my nearest craft store), but you could get it at JoAnns, or really anywhere else that sells yarn– it should be in that same section. It’s much thinner than regular yarn. I’ve also seen people use thread. Hope that helps!
Thanks so much for the directions, they were so helpful! Also, I found drilling before nailing made it so much easier.
Thanks for the tip Danielle!
Pingback: Hour Tour: Upstairs Landing | DIY Project-aholic
I want to do this for my sisters for their Christmas. I actually saw a girl working on one outside my dorm but I have no clue where to get the board from!
Hi Krystie, thanks for stopping by! You can get the board from any Home Depot or Lowes. Additionally, if you have a Habitat for Humanity ReStore you can check there 🙂 Good luck!
How did you weave in the ends of the yarn? I’m afraid of knots or loose strings showing.
I just tied the knot right next to the nail. Double knotted and pulled tight to secure. Then I cut the string as close to the knot as I could. I haven’t had any issues.
Thanks! I’m a crocheter, so I’m neurotic about my ends.
Thank you for including the cost! We are making these for a church activity!! 🙂